
Vouchers
A voucher is a gift or a discount your customer keeps in their Wallet and redeems at the counter with a QR code: 10% off, a free coffee, a birthday dessert. It does not depend on stamps or points: the customer collects nothing, they just show it at the counter. It lives in Dashboard → Vouchers, under Loyalty in the menu, and it unlocks once you have created a card. (It used to live inside Cards; nothing you already sent changed.)
What you create there is a template. Every time you send it, generate a QR code, or an automation or the birthday gift hands it out, Fidelip creates an individual voucher with its own code (for example ABCD-1234) and its own QR code, so you can track it customer by customer. Creating, editing and sending vouchers is for the owner and admins.
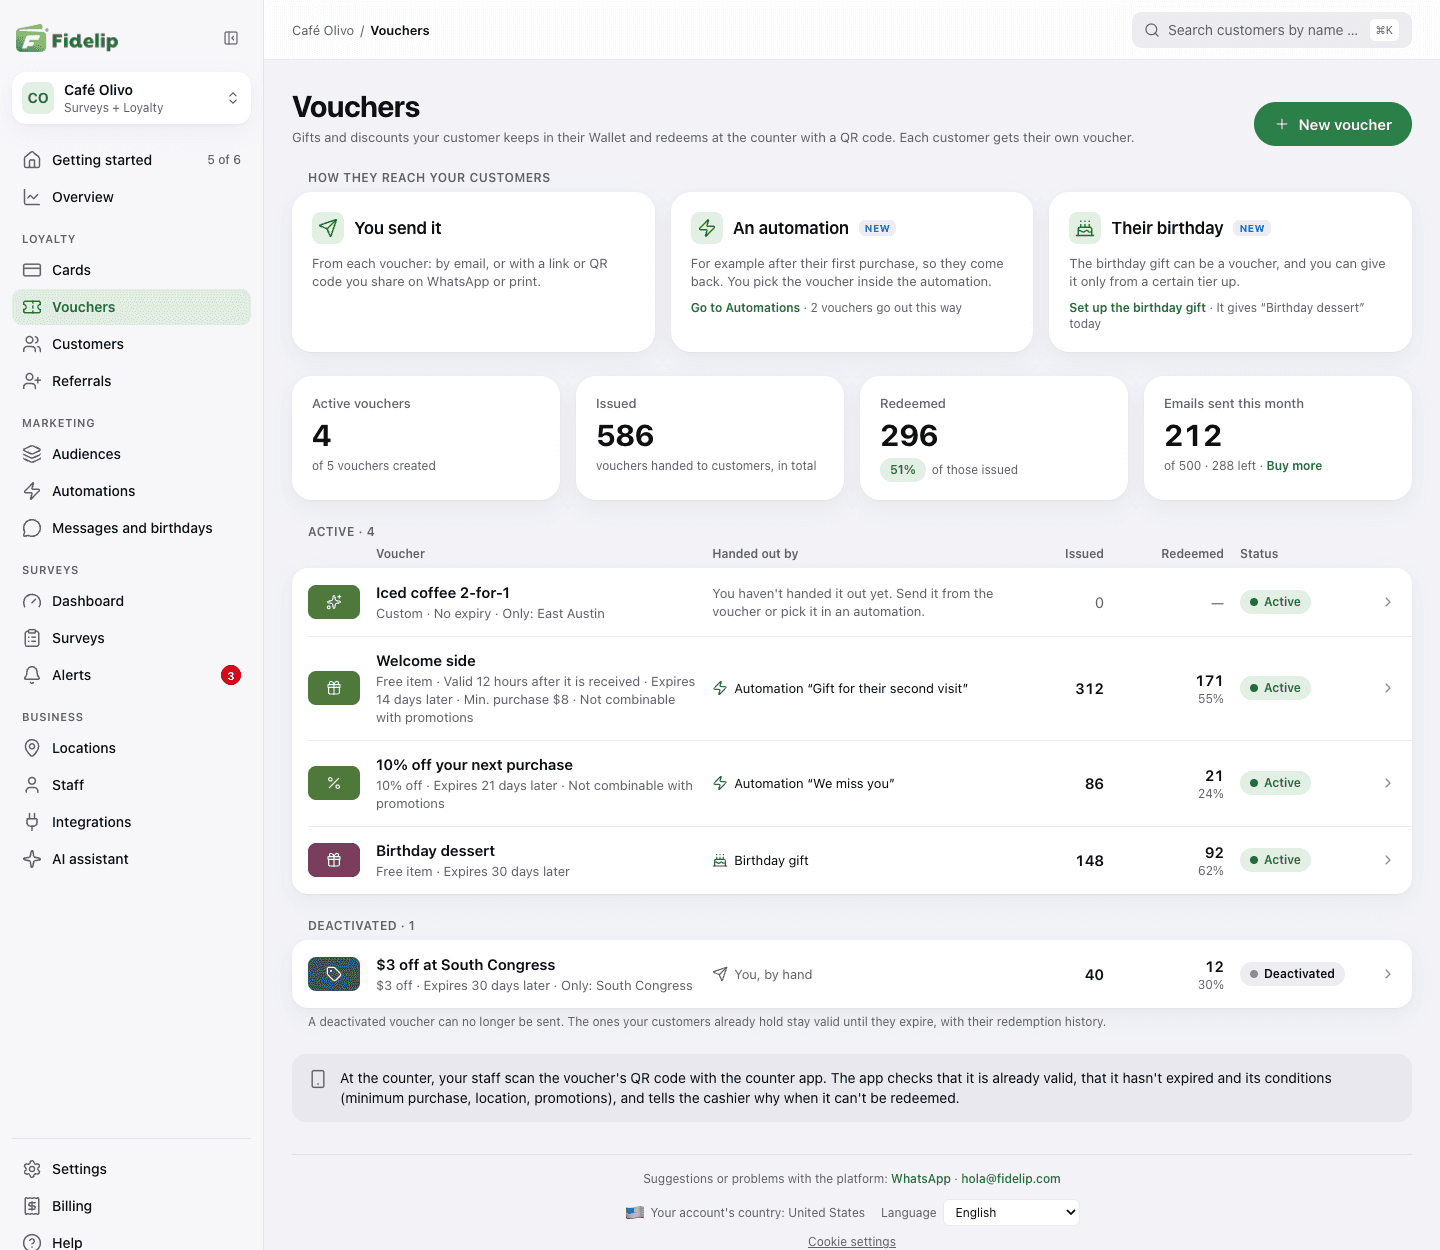
The list opens with How they reach your customers, four figures (Active vouchers, Issued, Redeemed and Emails sent this month) and your vouchers in two groups, active and deactivated. Each row sums up what the voucher gives, when it is valid and expires, its conditions, who hands it out (Handed out by) and how many were issued and redeemed. Select a row to open the voucher.
Create a voucher
Select New voucher. A sheet opens with the minimum to get started; the rest (when it becomes valid, when it expires, conditions and design) you set afterwards, on the voucher's page.
- Name itType it in Name. Your customer sees it in their Wallet and in the email, so use something you will recognize later, like “Birthday dessert”.
- Choose what it givesUnder What it gives there are four types, and they cannot be changed after the voucher is created. If you get it wrong, create another one.
- Add the value and the descriptionThe two discount types ask for the Discount value. The Description is optional and shows on the voucher inside the Wallet: on the back on iPhone, in the details on Android.
- Create itSelect Create voucher and we take you to its page.
| Type | What it is for |
|---|---|
| Percent discount | A percentage off the bill, from 1 to 100 (for example 10 = 10% off). |
| Discount in $ | A fixed amount (for example 50 = $50 off). The symbol is your business's currency. |
| Free item | A free product. Use the description to say which one. |
| Custom | Any other promotion (2-for-1, an upgrade, access). Explain it in the description. |
The voucher's page shows its name and status at the top, with the Send to a customer button, and below that what every voucher carries: when it expires, how many uses it has and its conditions at the counter. It has three tabs: Issued vouchers (the ones that already went out), Settings and Appearance.
Settings: when it is valid and how it is redeemed
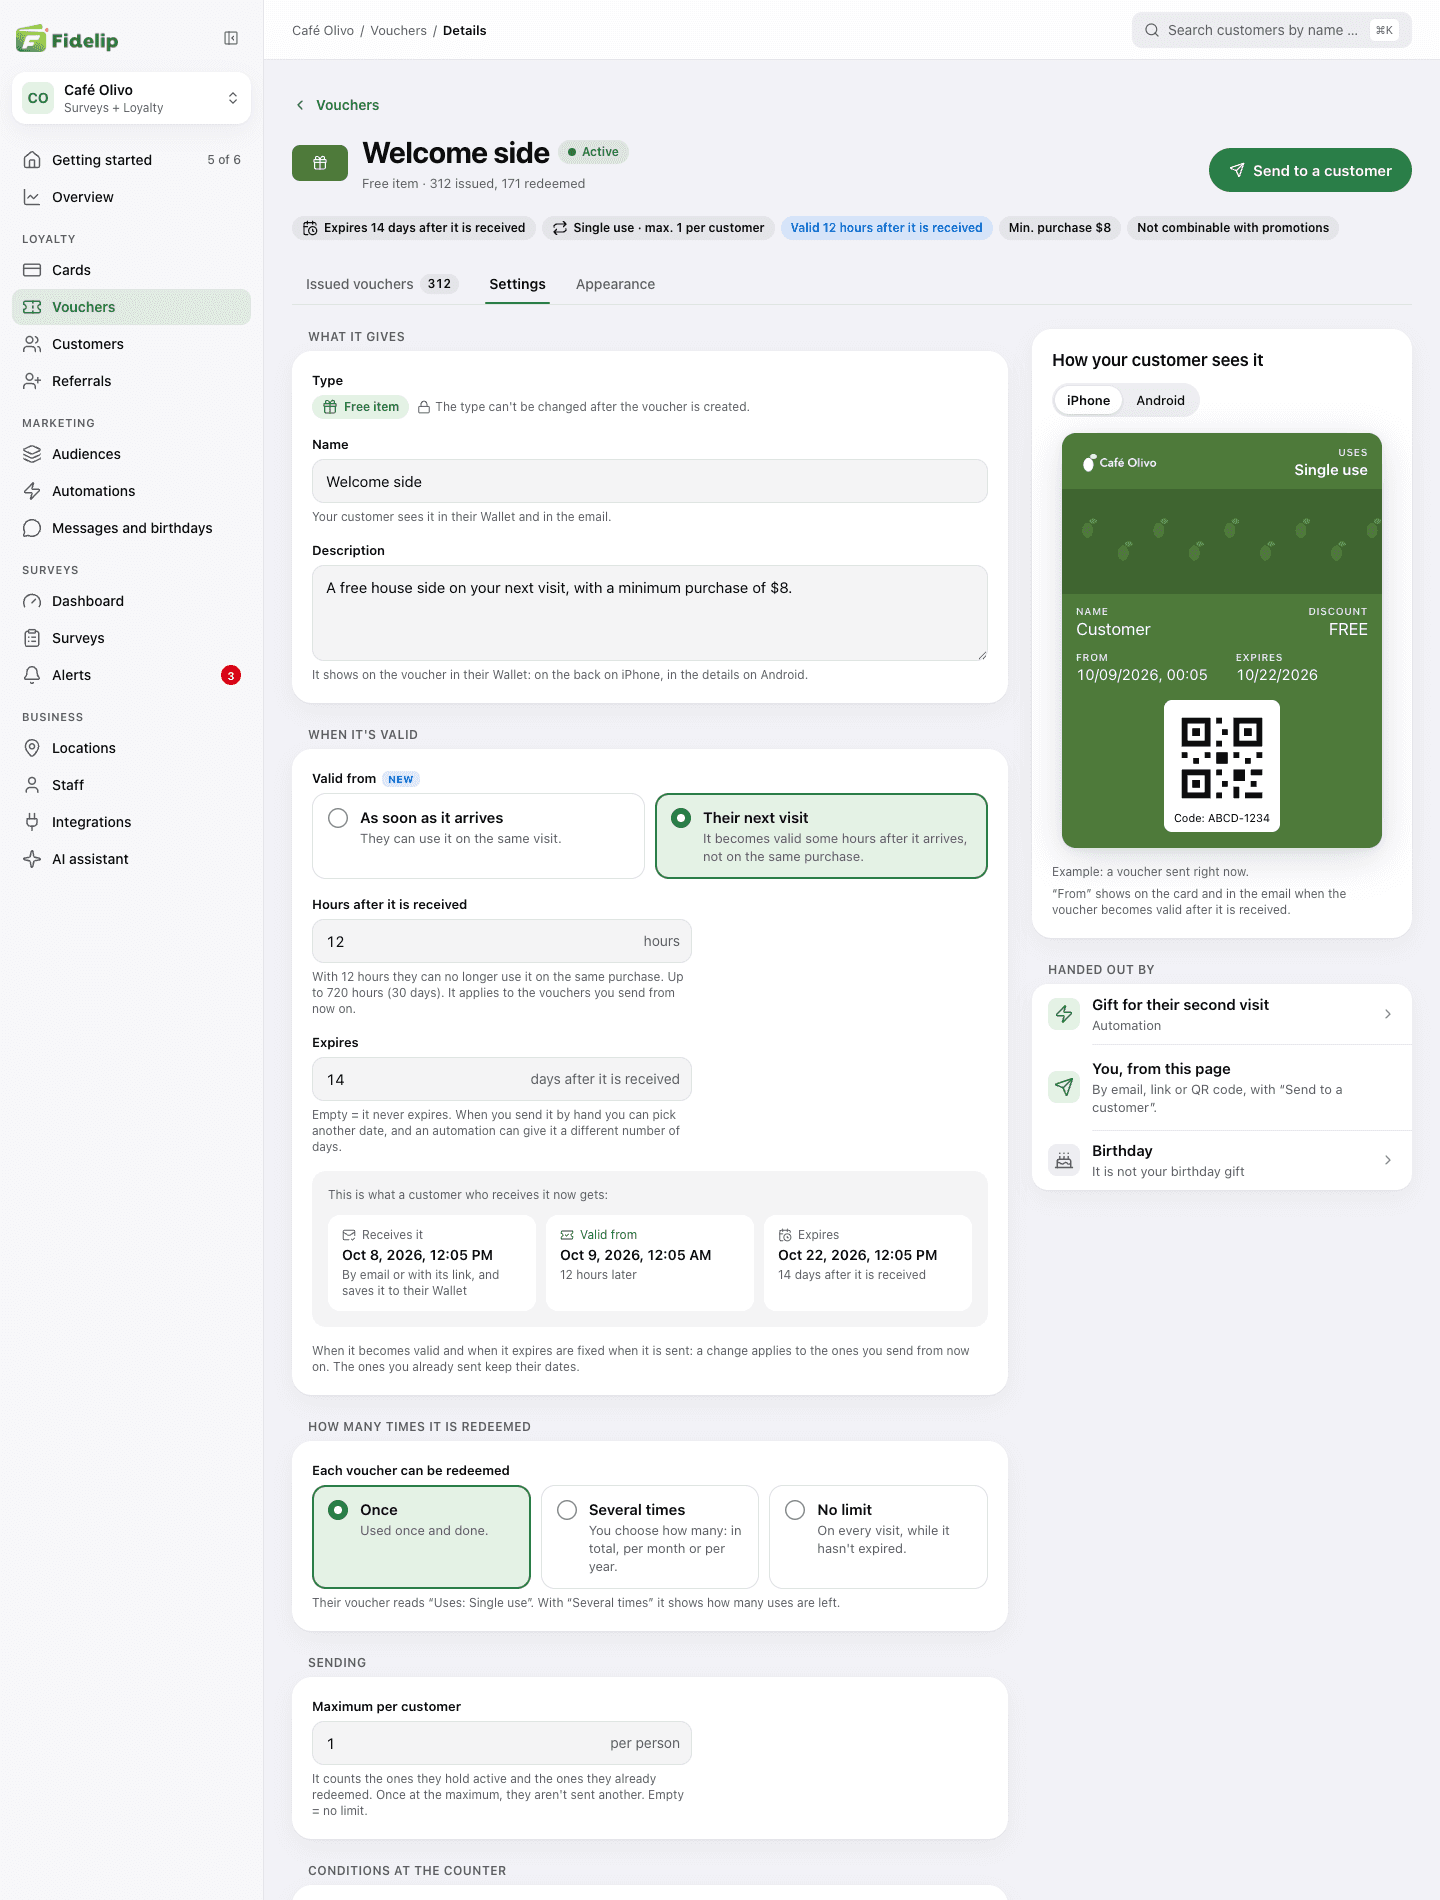
Settings gathers, top to bottom, everything that decides how the voucher behaves: the name, description and value, when it becomes valid, how many times it is redeemed, how many each customer can hold, and the conditions at the counter. Changes are saved together with Save changes; Discard throws them away. On the right you see how your customer sees it (How your customer sees it) and Handed out by: which automations give it away and whether it is your birthday gift.
When it is valid and when it expires
- Valid from: with As soon as it arrives the customer can use it on the same visit. With Their next visit you type how many Hours after it is received it starts to work (from 1 to 720): with 12 hours it no longer works on the same purchase. It is the way to give a gift “for next time”. The wait has to be shorter than the days it lasts, or the dashboard will not let you save.
- Expires: the days after it is received. Empty = it never expires. When you send it by hand you can pick another date, and an automation can give it a different number of days.
Below, a timeline shows what a customer who receives it right now gets (receives it, valid, expires). Both dates are fixed when it is sent: if you change these values, they apply to the vouchers you send from now on; the ones you already sent keep theirs.
How many times it is redeemed
| Option | What it does |
|---|---|
| Once | A single use. Once redeemed it is marked as redeemed and no longer works. |
| Several times | You set the Number of uses and the Period: In total (lifetime), Per month or Per year. With month or year, the counter resets every calendar month or year. |
| No limit | No cap: it can be used on every visit until it expires. Every redemption is logged. |
Under Sending, Maximum per customer sets how many vouchers from this template one person can hold. It counts the ones they hold active and the ones they already redeemed: once they reach the maximum, they are not sent another, whether by email or by link or QR code in their name. Empty = no limit. It does not apply to a QR voucher made with just a name, because it does not belong to a registered customer.
Conditions at the counter
They are optional: with none, it redeems as it always has. The staff app checks them on every redemption, also for vouchers you already sent, and when they are not met it tells the cashier why the voucher cannot be redeemed.
- Minimum purchase: the app asks for the ticket amount before redeeming. It needs the staff app, version 1.3.1 or later: a counter on an older version cannot redeem it and sees a notice to update.
- Only at these locations: pick one or several; if you pick none, it works at all of them. It only appears when your business has more than one open location.
- Not combinable with promotions: it cannot be redeemed while a promotion on any card is running. To block redemptions during certain hours without giving extra points, create an x1 promotion.
Deactivate or delete
The Active switch (under Status) decides whether the voucher can be sent: an inactive voucher cannot be sent. That is how you pause a promotion without deleting it.
A template you already sent cannot be deleted: its vouchers stay valid until they expire and their redemption history (who, when and at which location) is kept. To stop sending it, use Deactivate voucher under Deactivate or delete, or turn off Active. Only a template that was never sent can be deleted, with Delete voucher and by typing its name to confirm. If the voucher is the gift of an automation or the birthday gift, it cannot be deleted either, and deactivating it stops those gifts: the dashboard lists them before you confirm.
Appearance
Each voucher can look different from your loyalty card. In Appearance you adjust the Colors (Background color, Label color and Text color, white or black), the Logos (one per Wallet: the Apple Wallet one, for iPhone, at 480x150 px or 150x150 px, and the Google Wallet one, for Android, at 660x660 px, shown inside a circle) and the Voucher image (1125 × 432 px). PNG, JPG or SVG, up to 5 MB. On iPhone the image sits at the top, under the logo; on Android, at the bottom of the card.
Until you change something, the voucher uses your business's look: the same colors and logos you already set. The preview on the right (How your customer sees it, with iPhone and Android) shows how it is coming out. Colors and the image are applied only when you select Save changes, and Discard throws them away. The Google Wallet logo is the exception: it is saved as soon as you upload it. The new look shows on the vouchers you send from now on; the ones your customers already saved to their Wallet do not change.
The three colors are used on iPhone. On Android, Google Wallet decides the voucher's background and text color, and the voucher carries the title of your business's card.
Fidelip warns you if you change the same logo or the same image more than 3 times a day (the count is per type: logo on one side, image on the other). It is a warning, not a block.
Send vouchers
A voucher reaches a customer in three ways:
- You send it, by hand, with the Send to a customer button on the voucher's page. It is what the rest of this section explains.
- An automation: in Dashboard → Automations you choose Send a voucher and the Voucher; every customer who meets the rule gets their own (chapter 10).
- Their birthday: the birthday gift can be a voucher. You choose it in Dashboard → Referrals, under Give a birthday gift, with What do they get? set to A voucher (chapter 09).
Send to a customer opens a sheet with two ways to send it (How to send it). In both, the Expiry date is optional: if you do not pick one, it expires after the number of days you set in the settings.
- By email: they get an email with their voucher and the button to save it to Apple Wallet or Google Wallet. Under To whom pick My customers (search by name, email or phone; only customers with an email show up) or Type an email for loose addresses. Each send has a maximum number of recipients: if you go over, the dashboard tells you and you send it in two parts.
- Link or QR code: creates the voucher without sending an email. Under For whom pick My customers or Just a name (for someone who does not have a card yet; if you leave it empty, the voucher says “Bearer”). Select Create voucher with QR code: you get the QR code, the Shareable link (with Copy, to send on WhatsApp, SMS or social media) and the Download QR button to print it. Both lead to the voucher's page. It costs no email credits.
If someone unsubscribed from your emails (or did not agree to receive promotions), the voucher is created but the email does not go out: it shows as Skipped, and you can give it to them with a link or QR code.
The Issued vouchers tab lists every voucher that went out. At the top are four figures (Issued, Active, Redeemed and Expired, canceled or skipped) and below them a table with the Code, the Customer, How it arrived (by hand, automation or birthday), when it went out (Received), Valid from, Expires and its Status. You can search by code or customer and filter by Status and by How it arrived.
| Status | What it means |
|---|---|
| Active | The customer holds it and it can be redeemed. A several-use voucher stays Active after a redemption: underneath you see how many times it was used. |
| Not valid yet | It is in their Wallet, but it cannot be redeemed at the counter until its Valid from date. |
| Redeemed | Already used, with its date. |
| Expired | It passed its expiry date. |
| Canceled | You canceled it. |
| Skipped | The email was not sent: they unsubscribed from your emails or did not agree to receive promotions. |
At the end of each row there are icons to copy the link, download the QR code and, on an active voucher, cancel it (✕). Canceling means it can no longer be redeemed at the counter: the customer is not notified, the voucher stays in their Wallet, but when it is scanned the app says it is canceled. It cannot be undone; you confirm it with Cancel voucher.
What your customer sees
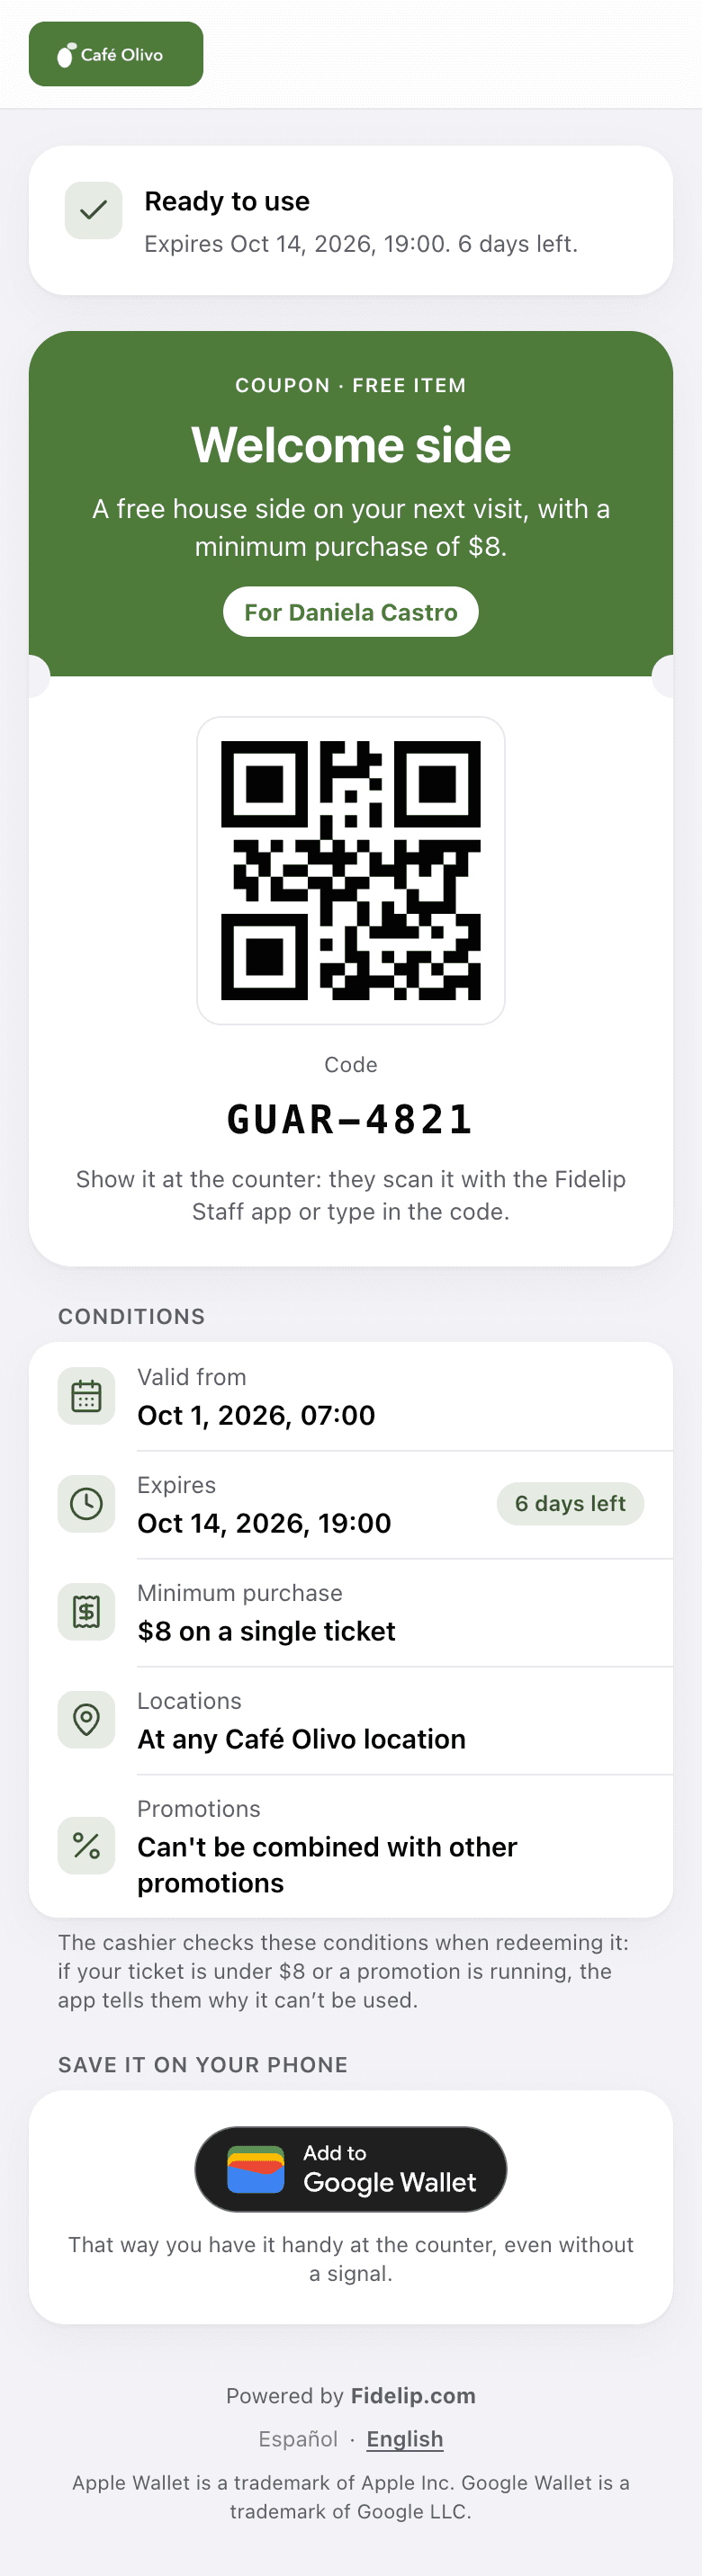
The email, the link and the QR code all lead to the voucher's page. It is painted in your business's colors and opens in the customer's language. (On that page the voucher is called a coupon.) It shows the voucher with its QR code and code, who it is for, and its Conditions: Valid from, Expires (with the days left), Minimum purchase, Locations and Promotions. Below it, Save it on your phone: on iPhone the Add to Apple Wallet button, on Android Add to Google Wallet and on a computer both. Once it is in their Wallet, they have it handy at the counter even without a signal.
The notice at the top says what state it is in: Ready to use (with the days left) or, if it does not work yet, since when, and it updates on its own when the time comes. If it was already redeemed (You’ve already used this coupon), expired (This coupon has expired) or you canceled it, the page says so and no longer offers to save it.
Email credits
Every voucher email (and every campaign email) uses one credit. Your account includes 500 emails a month and the counter resets at the start of each month. You see how many you have used in Emails sent this month, on the vouchers list, and on the Issued vouchers tab. If you need more, the owner buys packs, one time, in Dashboard → Billing, on the Email credits tab (or with Buy more from the vouchers list). Email credit packs are sold in Mexican pesos (MXN) in every country, as a single card payment. Purchased credits do not reset: they stay until you use them, and Fidelip spends the month's credits first.
| Pack | Price |
|---|---|
| 500 emails | $99 MXN |
| 1,000 emails | $179 MXN |
| 2,500 emails | $399 MXN |
When you reach zero, sending by email is blocked until you buy more credits or the new month starts; before you send, the dashboard warns you if you do not have enough. Generating the QR code and sharing the link on WhatsApp is always free, and for big promotions it usually works better.
Redeem at the counter
There is no screen to switch to and no special mode to turn on: your team scans the voucher from the Scan tab of the staff app, the same one as always. The app recognizes that it is a voucher and, instead of the customer's card, shows the promotion: name, discount, whose it is, when it expires (if it has a date), the minimum purchase or the locations if it has them, and the uses so far against the cap, for example “2 of 5 this month” (for single-use ones, “0 of 1”).
- The customer shows their voucherThe app reads the QR code from the voucher's page, the email or the printed PNG, and also the code of the pass saved in Apple Wallet or Google Wallet. There is another way: if you scan the customer's loyalty card, their vouchers that already work show up on their screen as blue tags; tap one to open it without losing the customer. The ones that do not work yet show with their date and cannot be tapped.
- Redeem itTap Redeem voucher. If it has a minimum purchase, the app asks for the ticket amount first. If it expired, does not work yet, was canceled, ran out of uses or does not apply at that location, the app refuses it and explains why on screen.
- Made a mistake? UndoAfter redeeming, a button to undo the redemption appears for 30 seconds. When you use it, the voucher is available again. With one exception: on Several times vouchers the undone redemption still counts against the cap, so that use is not given back.
Every redemption records who processed it and at which location. You see that history in the dashboard: on the Issued vouchers tab, open the voucher's row and the Redemption history appears, with date, operator and location.