
Team and locations
A location is each physical site of your business. It is also the billing unit: the Surveys + Loyalty plan costs $49 USD/month for the first location and +$19 USD/month for each extra location. The Surveys plan is one flat price per business and puts no limit on locations. Your team and your kiosks are assigned to specific locations. These are United States prices, before sales tax; other countries are billed in their own currency (see the home page).
Roles
| Role | What they can do |
|---|---|
| Owner | Everything, Billing included. Sees every location without being assigned to it. There can be more than one: the person who opened the business is the Main account, which can't stop being an Owner and can only be changed by that person. |
| Admin | The dashboard and the app: cards, rewards, vouchers, customers, surveys, and the Staff and kiosk accounts. Doesn't see Billing. Only an Owner can invite or change other Admins and Owners. |
| Staff | The counter app, at their locations: scan, earn, redeem and run surveys. They don't see the team or billing. |
| Kiosk | An account with only a name and a PIN, so you know who attended when a customer answers the survey on the counter tablet. It doesn't sign in to the dashboard or the app. |
PINs don't depend on the role, and they are not the password. There are two, and they are different:
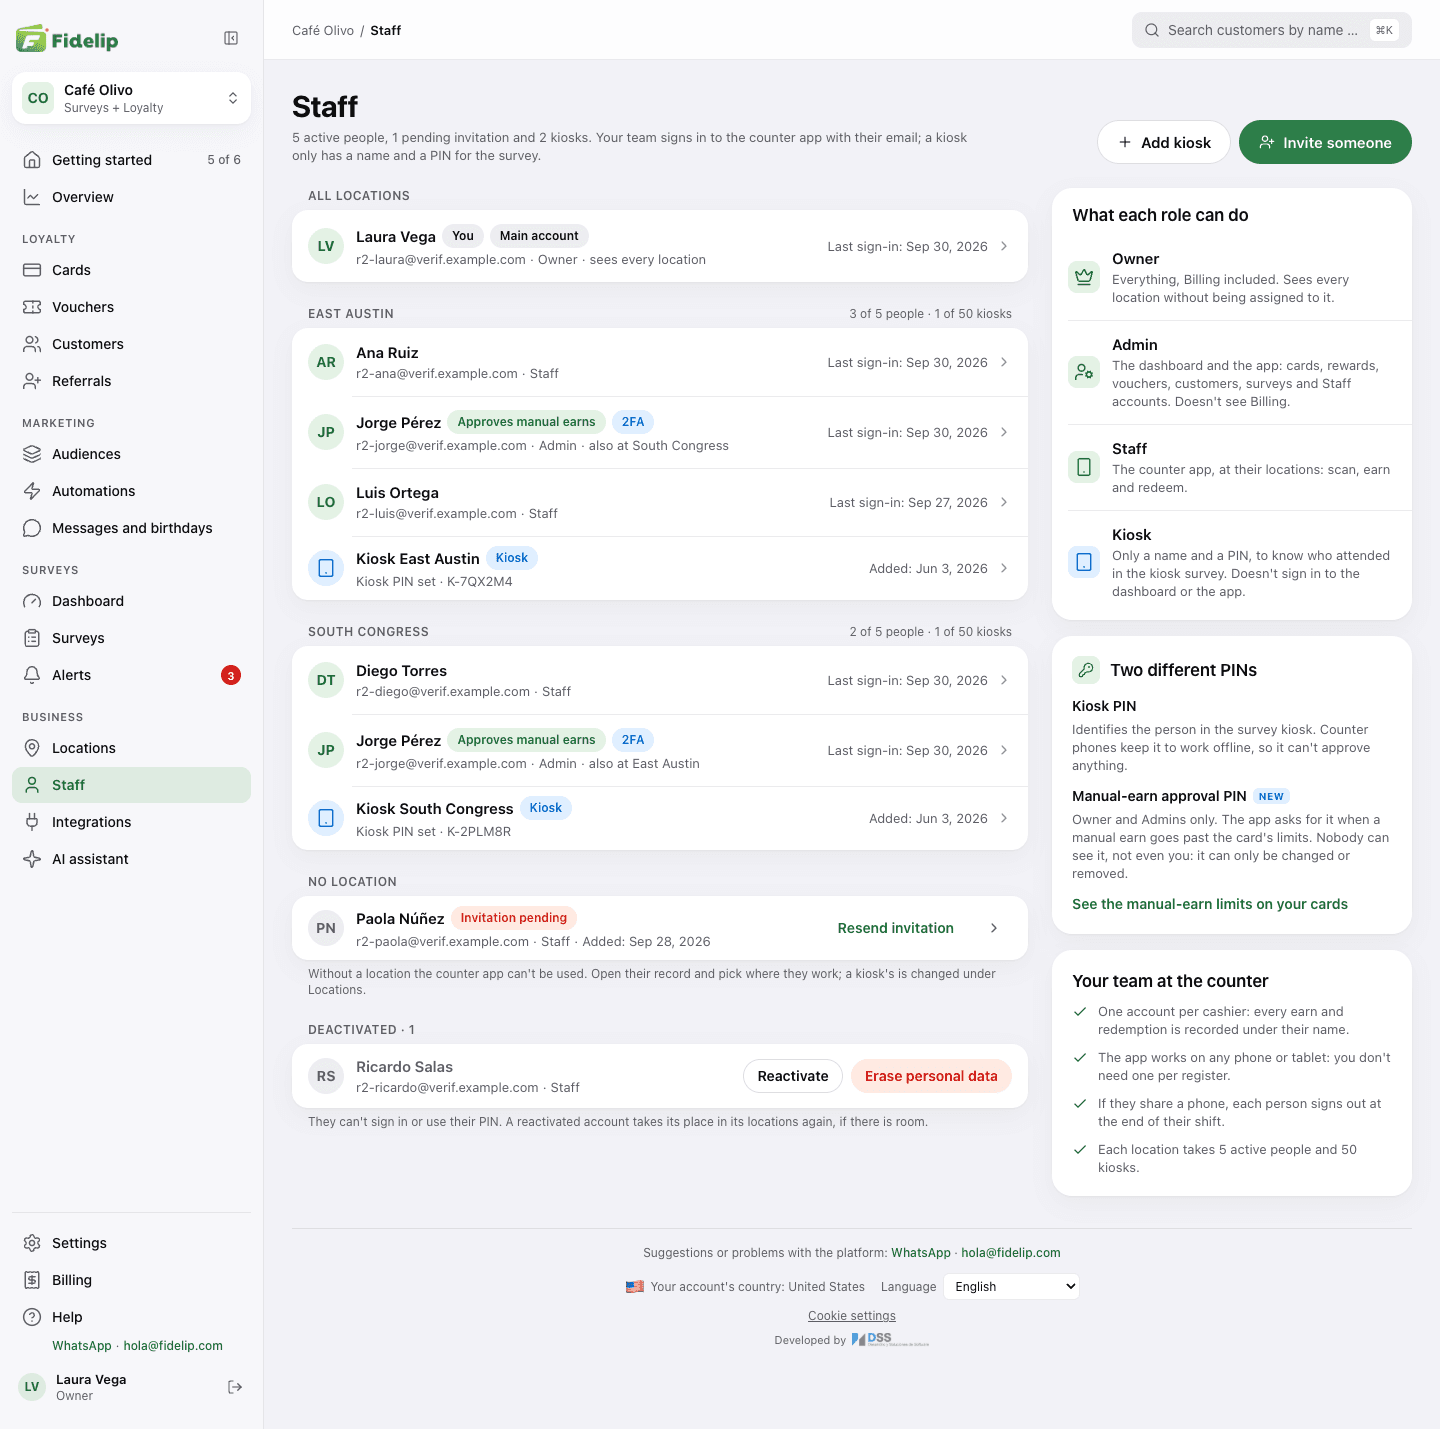
- Kiosk PIN: identifies the person (or the kiosk) in the kiosk-mode survey, and the kiosk PIN of any active account in the business also gets you out of kiosk mode. Counter phones keep it so it works offline, so it can't approve anything.
- Manual-earn approval PIN: Owners and Admins only. The app asks for it when a manual earn goes past the card's limits. An Owner sets it in the person's record; nobody can see it, not even you: it can only be changed or removed.
No PIN can match another PIN in the business, and the approval PIN can't match the same person's kiosk PIN.
How many accounts per location
- 5 active people per location (Admins and Staff).
- 50 kiosks per location.
Deactivated people don't count toward the limit, so you can deactivate and reactivate accounts without affecting your quota; when you reactivate one, it takes its place at its locations again if there is room. Dashboard → Staff shows how many places each location has used, and a person's record warns you when a location is full.
Invite team members
- Create the locations firstFrom Dashboard → Locations, create each site with New location (see Create and look after your locations). Without a location a person can't use the counter app. If your plan includes loyalty, Locations and Staff unlock once you create your first card in Cards.
- Invite the personIn Dashboard → Staff, click Invite someone and fill in Email, First name, Last name and Role (Staff, Admin or Owner; an Admin can only invite Staff). Under Where they work, check their locations (it doesn't appear for an Owner, who sees them all) and, if they will also attend the kiosk survey, their Kiosk PIN. Send invitation emails them a link to create their password.
- Follow up on the invitationUntil they create their password they show as Invitation pending, and you can send the email again with Resend invitation.
- Change where they work when you need toOpen their row in Staff and adjust Locations (it is saved with Save changes), or open the location and use Team at this location: there Assign and Remove take effect right away.
The Staff page groups your team by location: Owners at the top, under All locations; anyone without a place to work under No location; and deactivated accounts at the bottom. When you open a person you see their Details, their role, their Locations, the two PINs and Sign-in and security: there you can resend the invitation, email them a link to choose another password (Send email, Owners only) and see whether they have Two-step verification on (if they lost their phone, see the troubleshooting entry on lost two-step verification). An Admin can only change Staff and kiosk accounts.
Add a kiosk
A kiosk doesn't sign in: it is a name and a PIN. In Dashboard → Staff, click Add kiosk, enter the name (the last name is optional), a 4-digit Kiosk PIN (Generate suggests one) and choose its location. It appears inside its location with Kiosk PIN set: the list never shows the numbers. To move it to another location later, use Team at this location in Locations.
When someone leaves the team
Open the person in Dashboard → Staff and click Deactivate. The dialog tells you what happens: they can't sign in and their open sessions end, the counter app included; their place at each location is freed; their earns and redemptions stay in the history under their name and your customers' balances don't change; and their email stops getting survey alerts (if someone else uses it, change the recipient in the survey). If they were the only person who could approve manual earns, the dialog warns you.
The account moves to the deactivated group at the bottom of the page. There you can Reactivate it or Erase personal data: their name, email, PIN and access are erased, their history stays as «Deleted staff member» and their email is free for another account. This can't be undone; you can also do it while deactivating, with Also erase their personal data (Deactivate and erase data). For an Owner, first change their role to Admin: an owner's data can't be erased.
Create and look after your locations
Dashboard → Locations separates your active locations from the inactive ones (only Owners and Admins see it). Each row shows its address, how many people and kiosks it has, and whether it is already pinned on the map; open one to see its record.
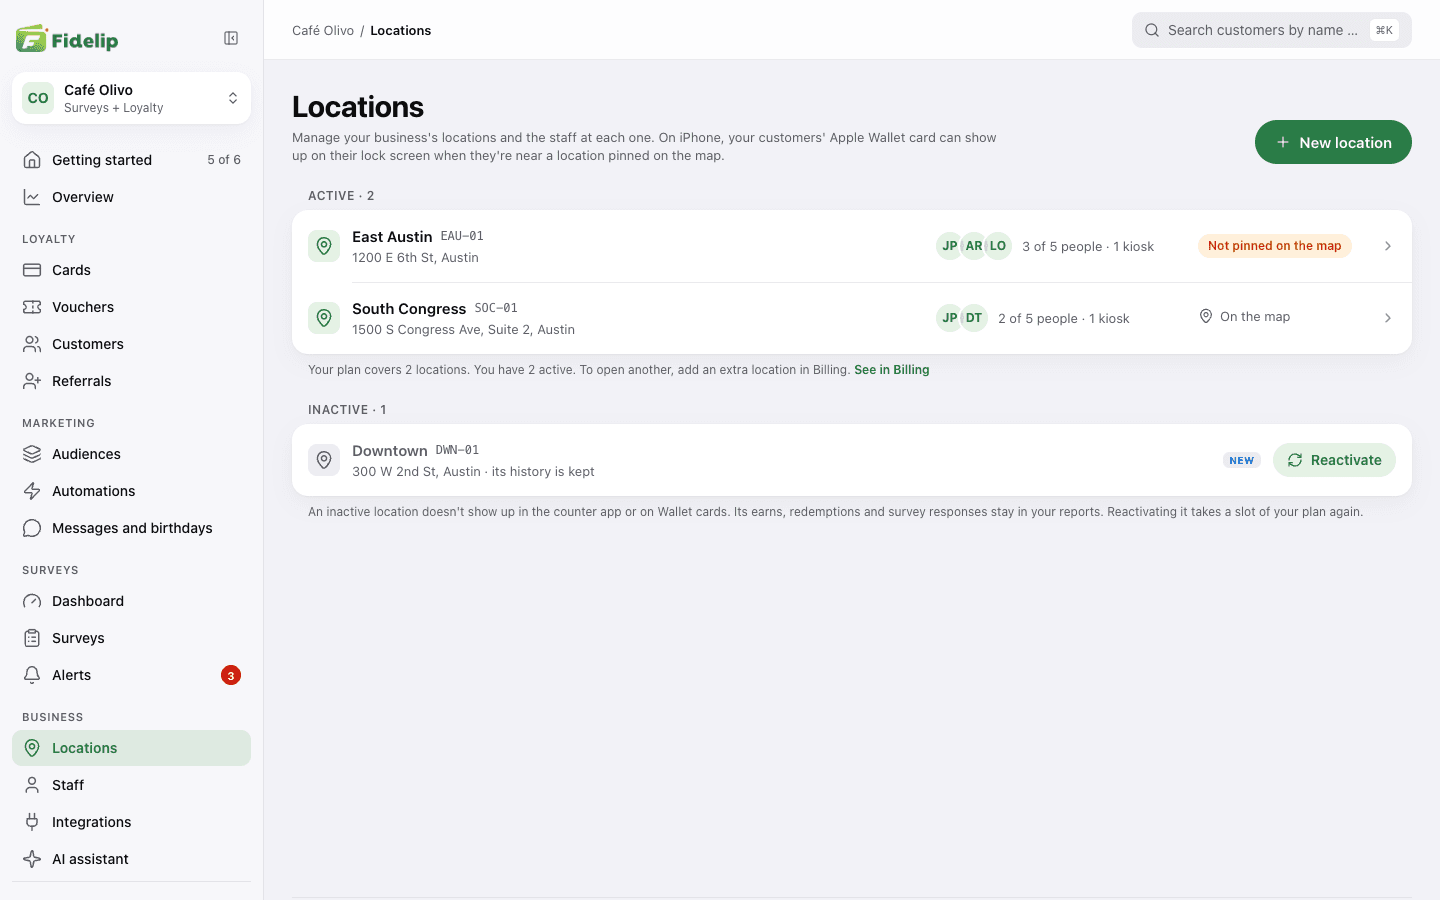
- New location: enter the Location name (the only required field), an optional Internal code for your reports and your point of sale (your customers don't see it), and the address: with Search an address or business pick an option and the street and the point on the map are filled in. The Time zone is the business's unless you change it, and it sets that location's clock, for example for hourly promotions. Add the Location contact if you want and click Create location; then open it to assign your team.
- On the map and Message when nearby: tap the map to move the point, or use Use my location. On iPhone, your customers' Apple Wallet card can show up on their lock screen when they are near a pinned location, with the message you write (up to 100 characters). The iPhone decides when and at what distance; Google Wallet on Android doesn't show it.
- Team at this location: who works there, against the location's quota, and Assign someone from your team. Owners aren't assigned: they already see every location.
- Deactivate location: the location stops showing in the counter app and its point leaves the Wallet cards; rewards or vouchers that are valid only there can't be redeemed while it is inactive. Its earns, redemptions and survey responses stay in your reports and balances don't change. You can't deactivate your only active location. To use it again, click Reactivate.
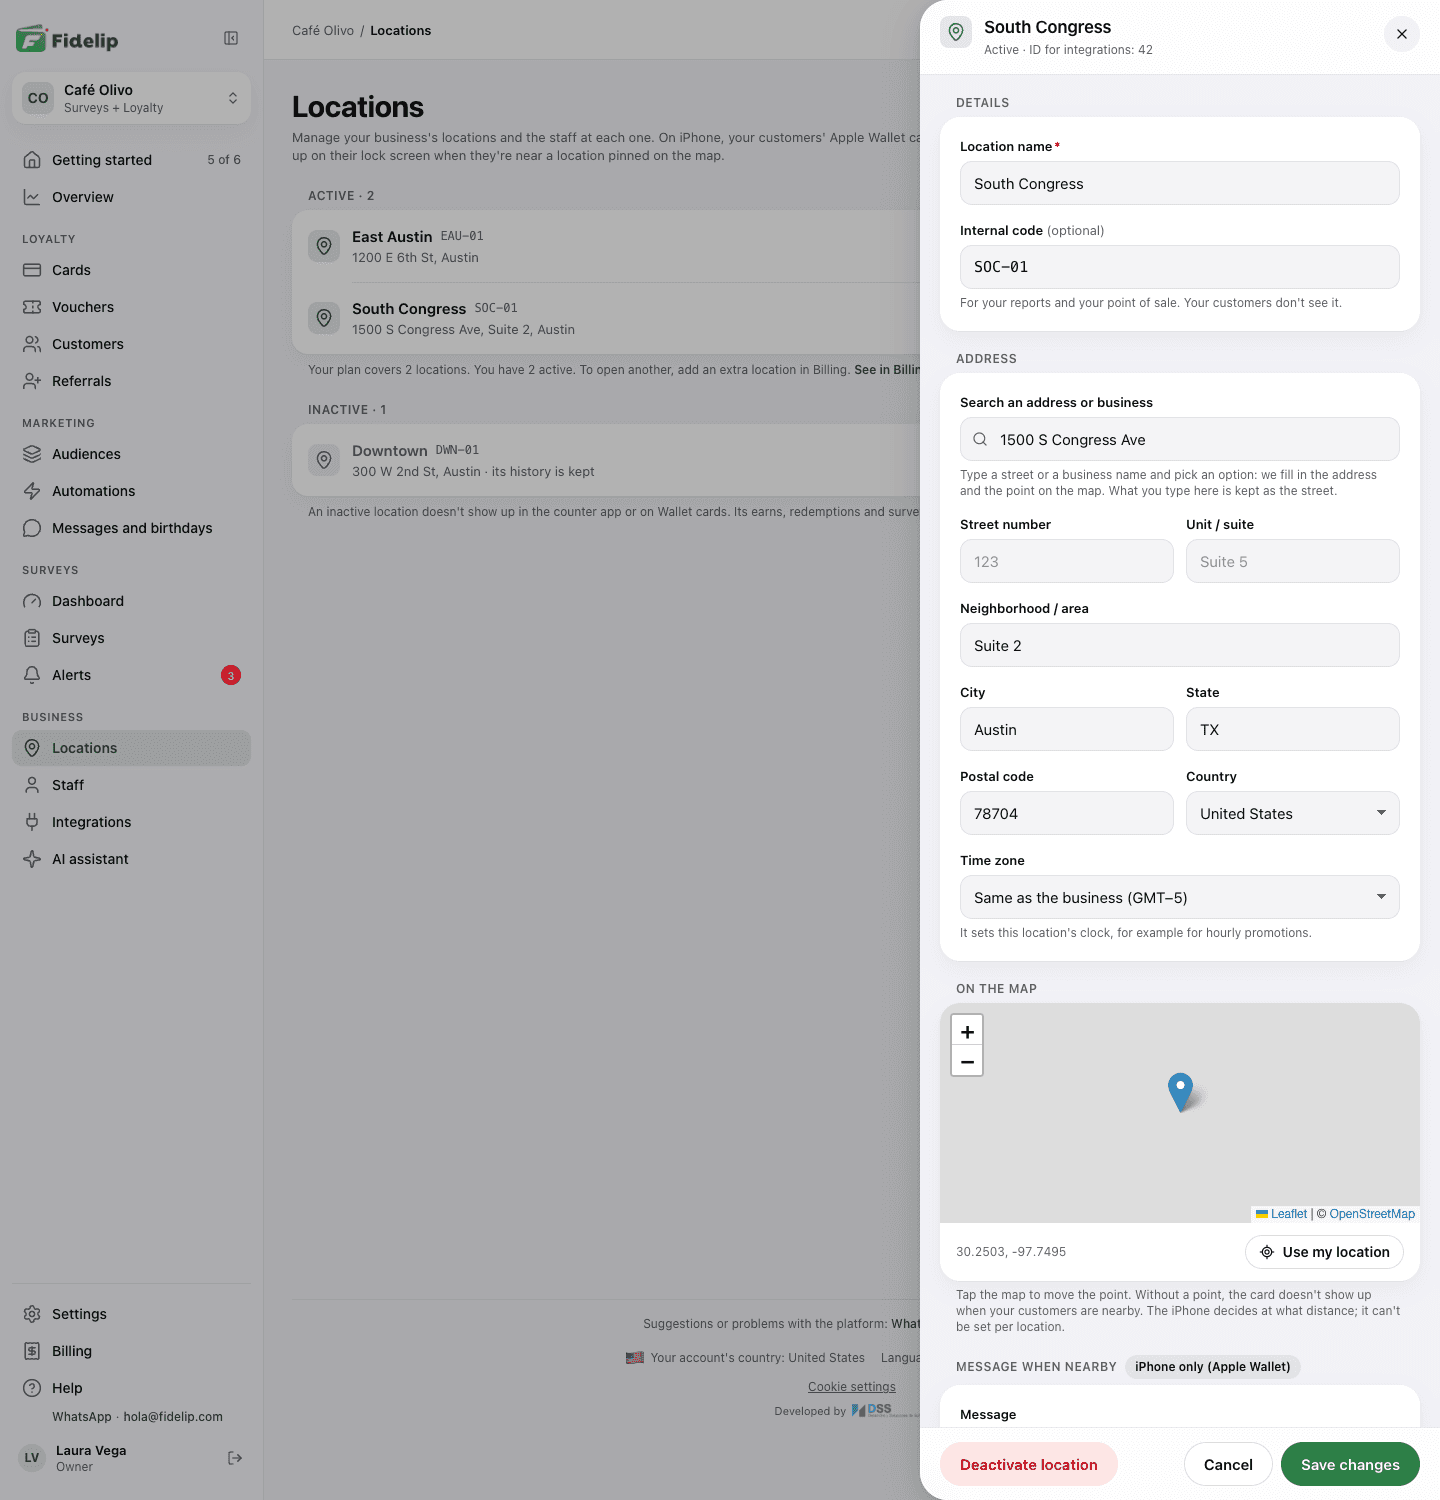
Your plan pays for a number of active locations, and the page tells you how many you have. When they are all taken, New location and Reactivate explain the limit and send you to Billing (only the Owner sees it) to add an extra location: see the extras in Plans and limits. If you have more active locations than your plan pays for, all of them keep working in full (earning and redeeming, your team in the app, reports and the Wallet card); you just can't add or reactivate another until you add the missing ones or deactivate one. Deactivating a location doesn't change your bill: an extra location keeps being charged until you remove it in Billing.