
Get started in 15 minutes
You can have a loyalty card working the same day you create your account. This is the shortest route: five steps, nothing optional. Each step links to the chapter that covers it in depth, in case you get stuck. But if you just follow the list, you will have customers signing up today.
What you need before you start
| Item | Why |
|---|---|
| A business email address | It receives the verification code and, later, billing notices. Use one that more than one person can open. |
| Your logo as a PNG | Ideally transparent and horizontal. If you also have a square version, even better: Android asks for it separately. It is what makes the card look like yours from day one. |
| A payment card | You are not charged during the 10-day free trial, but the card is requested when you create the account. |
| A phone for your team | To install the Fidelip Staff app and try the first scan. |
The five steps
- Design your card and create your account (5 min)Go to
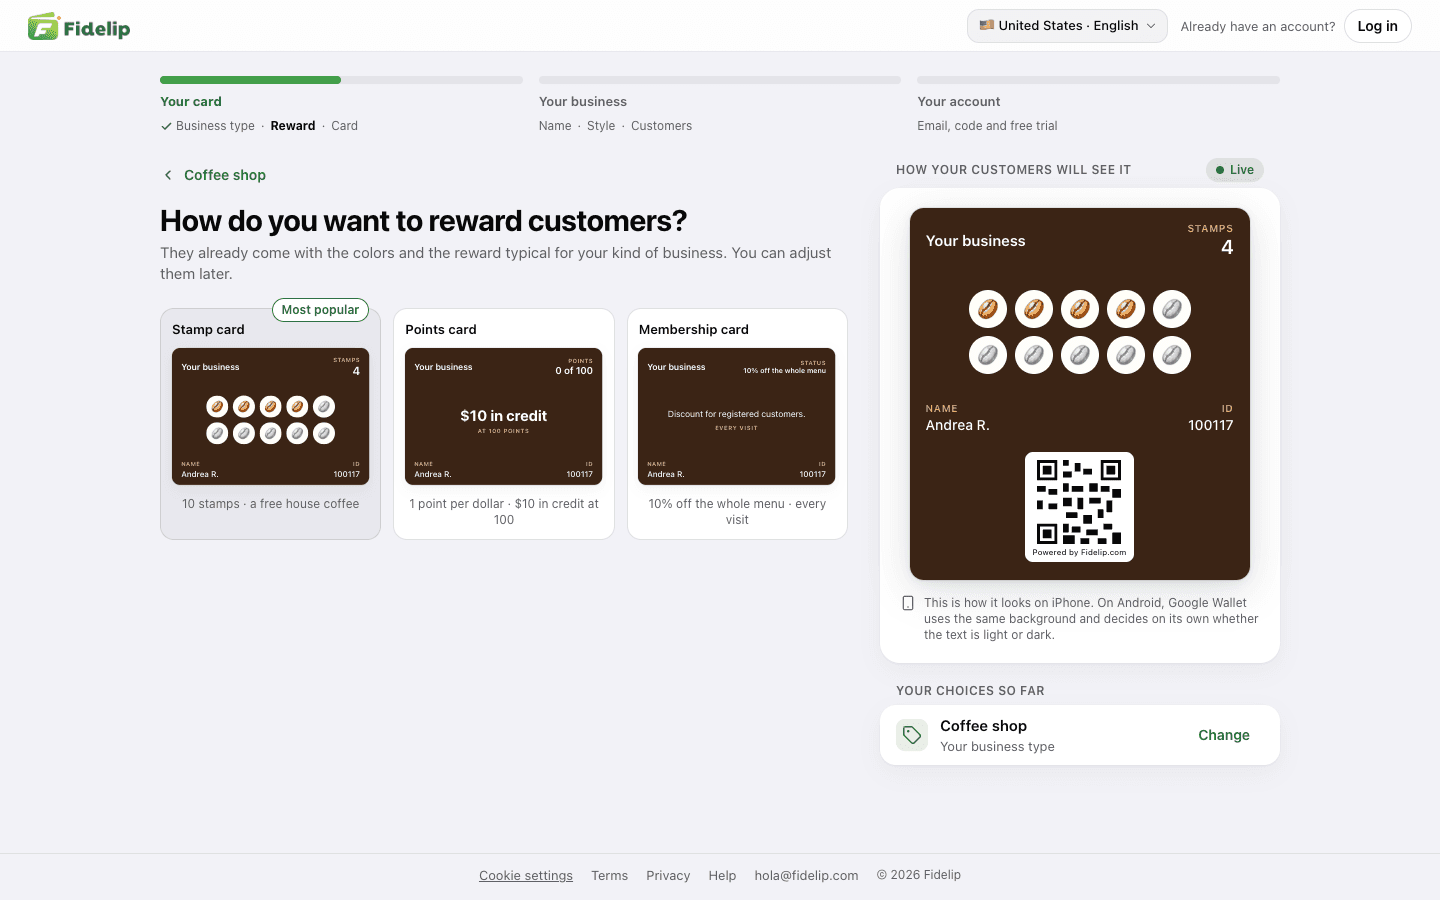
id.fidelip.com/createand build your card while you watch it take shape live: Business type, Reward (stamps, points or membership), Card (its details and the reward), Name, Style (color and stamp) and Customers (what you ask them when they sign up). At the end you create the account: you verify your email with a 6-digit code, choose your plan and save a payment method. Choose Surveys + Loyalty: with the Surveys plan, the card you designed is not created. When you finish, that card is already in your dashboard with its reward and its rule: you do not have to build it again. If you sell something cheap and repeatable (coffee, a haircut, a car wash), choose stamps: they are the easiest thing for a customer to understand. Details in Create your account. - Complete the setup guide (5 min)The first time you open the dashboard as the owner, it opens Getting started; after that you find it at the top of the menu, with how many steps you have done. It walks you through what the design does not cover: your logo and the Android logo, your contact details and adding your location. Almost everything checks itself off when you do it; the rest you mark yourself with I did it. A week after you finish it, or as soon as you hide it, it moves to the bottom of the menu as Setup guide. Details in After you sign up.
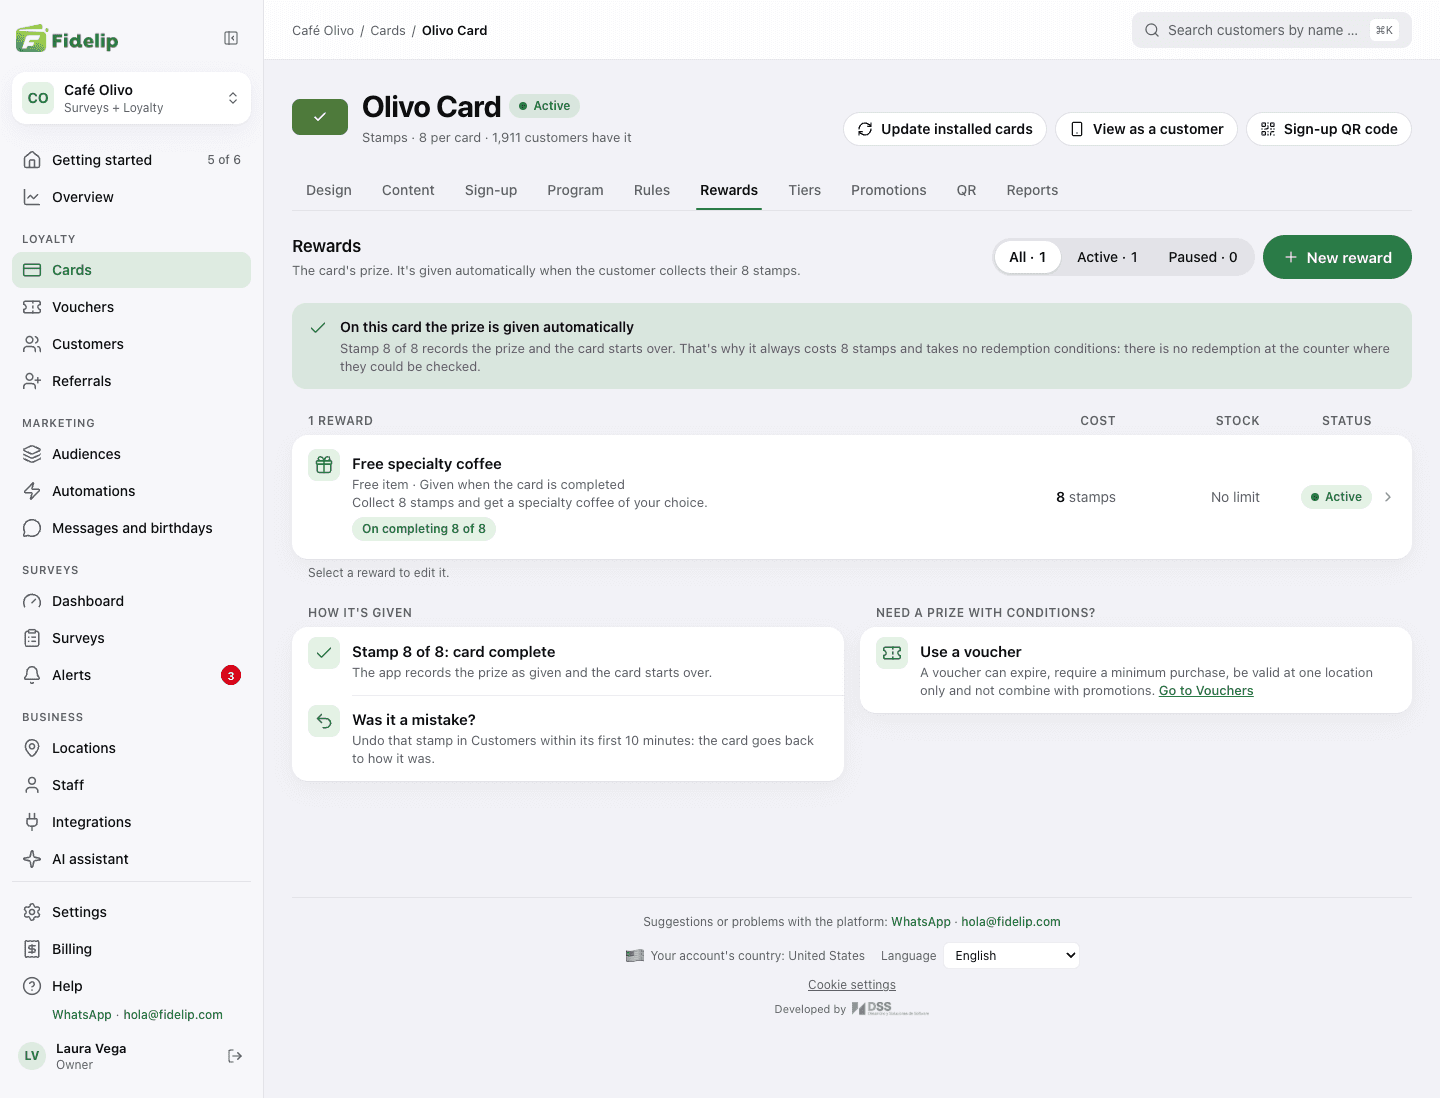
- Review the reward and the rule (1 min)In Dashboard → Cards, open your card. Under Program, confirm how many stamps it takes (Stamps to complete the card) or the Points goal. Under Rewards, give the reward its real name: it shows on the Wallet card and in the counter app. On a stamp card the reward is given automatically: with the last stamp, the app records the reward and the card starts over. Getting started also takes you to these two screens. Details in Set up your loyalty program.
- Print your sign-up QR code (1 min)From Getting started, or on the QR tab of your card, download the print-ready QR code (Download PNG or Print-ready PDF) and put it at the counter. It is also at Dashboard → Settings → Sign-up QR code to print. Every customer who scans it lands on your sign-up page and leaves with the card in their Wallet.
- Install the app at the counter and try it yourself (3 min)Download the Fidelip Staff app (App Store or Google Play; in the store it is listed as “Fidelip - Loyalty & Surveys”), sign in with your email and password, and run a test: sign up as a customer yourself and, on the Scan tab, scan your own QR code. Details in The staff app.
Want a second card (for example, stamps for coffee and points for food)? Your plan includes one active loyalty card: on Cards, the Add an extra card button takes you to Billing (+$19 USD per month), and then you create it at Dashboard → Cards → New card. See Set up your loyalty program.
Run the full test on yourself before launching with customers: sign up (with the printed QR code or with View as a customer, in your card’s header), add the card to your Wallet, ask a cashier to scan you and confirm the stamp shows up on your phone within seconds. Five minutes of testing prevent most of your team’s questions on the first day.
What to do next (and what can wait)
Everything above is all you need to operate. The rest becomes useful once customers are collecting, not before:
| When | What to turn on |
|---|---|
| Week 1 | A short after-visit survey (Dashboard → Surveys) and the referral program (Dashboard → Referrals). |
| When you reach ~100 customers | Your first message on the card (Dashboard → Messages and birthdays), and the automations (Dashboard → Automations) that win back inactive customers. |
| When you reach ~500 customers | RFM audiences (Dashboard → Audiences) to see who your regulars are and who is drifting away, and VIP tiers (Dashboard → Cards → Tiers) if you want to reward your biggest spenders. |
| When you open another location | Add the location (Dashboard → Locations) and assign its staff (Dashboard → Staff). Customers keep using the same card at all of them. |
The loyalty program requires the Surveys + Loyalty plan ($49 USD per month per location). If you only want surveys, the Surveys plan ($19 USD per month) includes them without a loyalty card. These are United States prices, before sales tax; other countries are billed in their own currency (see the home page). See Plans and limits.